Amazon NLB
Objectives
Configuring an Amazon NLB is a multistage process. We've broken it down into multiple tasks so that it's easy to follow.
Begin by creating two target groups for the TCP protocol, one regarding TCP port 443 and one regarding TCP port 80 (providing redirect to TCP port 443). You'll add your Linux nodes to these groups.
Add your Linux nodes to the target groups.
Use Amazon's Wizard to create an Network Load Balancer. As part of this process, you'll add the target groups you created in 1. Create Target Groups.
Note: Rancher only supports using the Amazon NLB when terminating traffic in
tcpmode for port 443 rather thantlsmode. This is due to the fact that the NLB does not inject the correct headers into requests when terminated at the NLB. This means that if you want to use certificates managed by the Amazon Certificate Manager (ACM), you should use an ELB or ALB.
Create Target Groups
Your first NLB configuration step is to create two target groups. Technically, only port 443 is needed to access Rancher, but its convenient to add a listener for port 80 which will be redirected to port 443 automatically. The NGINX ingress controller on the nodes will make sure that port 80 gets redirected to port 443.
Log into the Amazon AWS Console to get started, make sure to select the Region where your EC2 instances (Linux nodes) are created.
The Target Groups configuration resides in the Load Balancing section of the EC2 service. Select Services and choose EC2, find the section Load Balancing and open Target Groups.
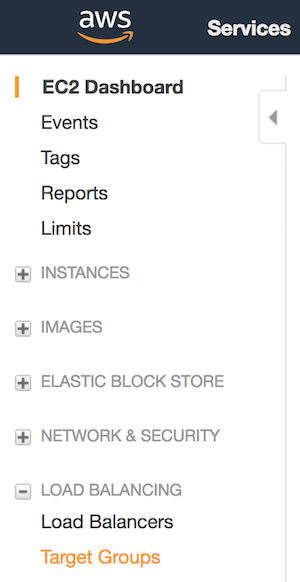
Click Create target group to create the first target group, regarding TCP port 443.
Target Group (TCP port 443)
Configure the first target group according to the table below. Screenshots of the configuration are shown just below the table.
| Option | Setting |
|---|---|
| Target Group Name | rancher-tcp-443 |
| Protocol | TCP |
| Port | 443 |
| Target type | instance |
| VPC | Choose your VPC |
| Protocol (Health Check) | HTTP |
| Path (Health Check) | /healthz |
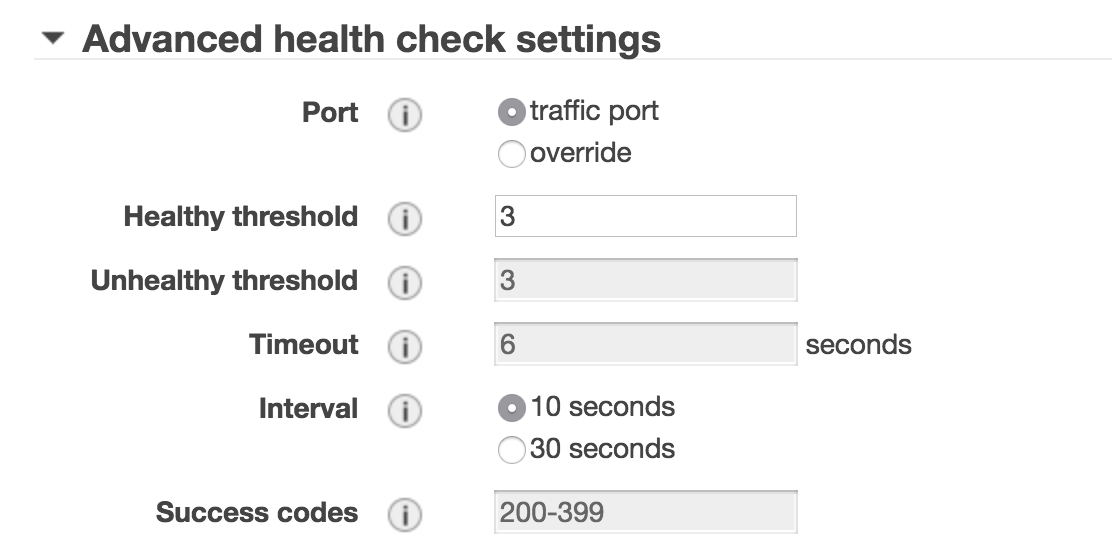
| Port (Advanced health check) | override,80 |
| Healthy threshold (Advanced health) | 3 |
| Unhealthy threshold (Advanced) | 3 |
| Timeout (Advanced) | 6 seconds |
| Interval (Advanced) | 10 second |
| Success codes | 200-399 |
Screenshot Target group TCP port 443 settings
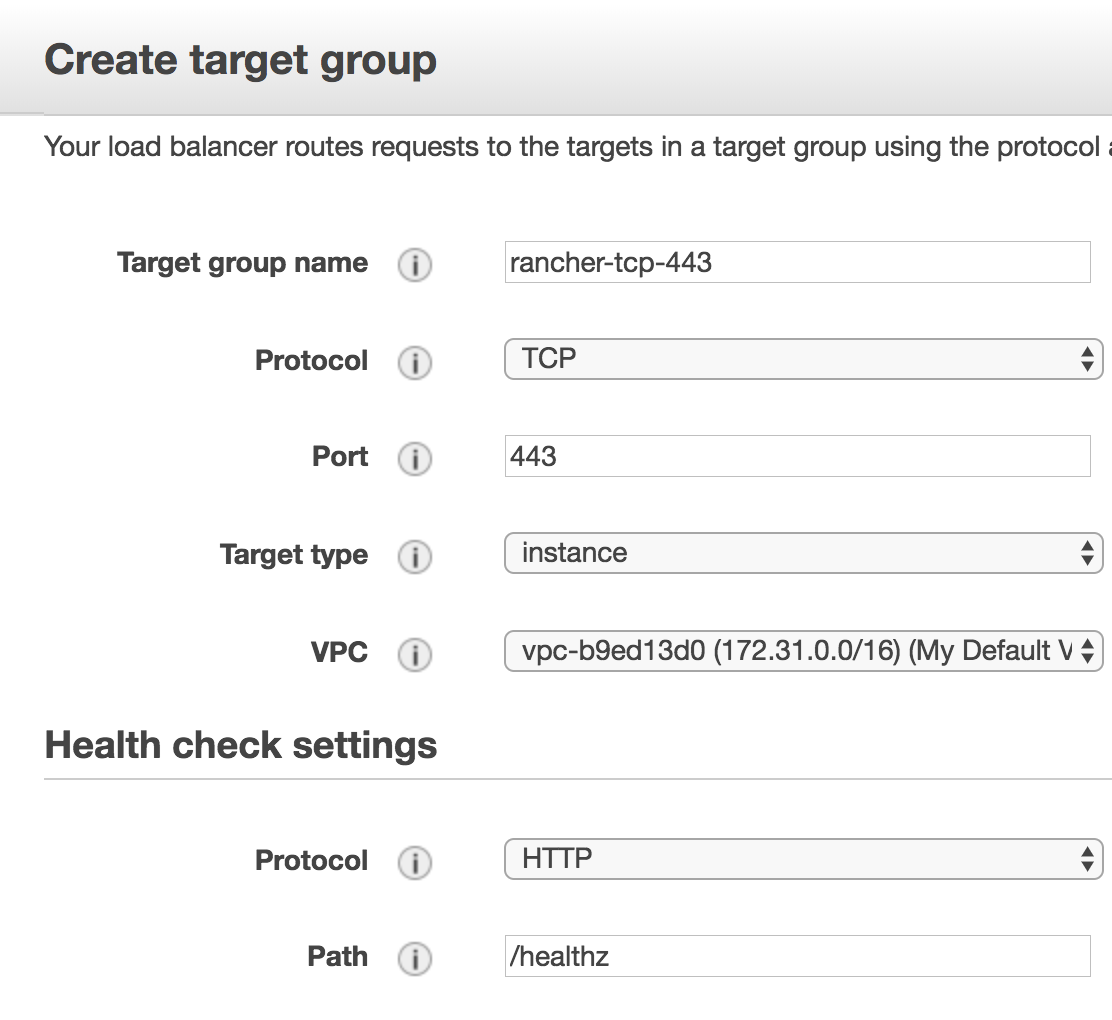
Screenshot Target group TCP port 443 Advanced settings
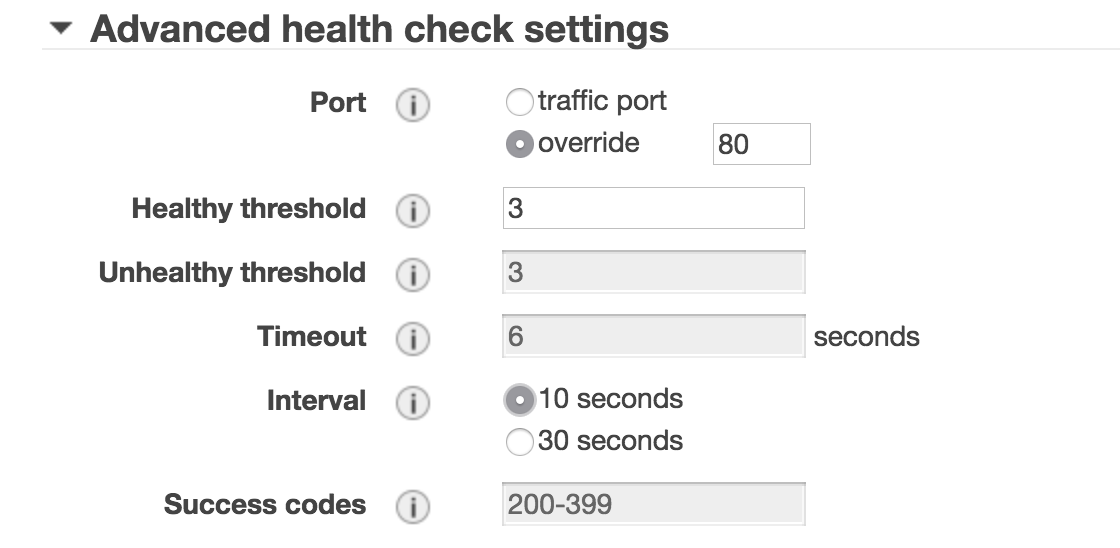
Click Create target group to create the second target group, regarding TCP port 80.
Target Group (TCP port 80)
Configure the second target group according to the table below. Screenshots of the configuration are shown just below the table.
| Option | Setting |
|---|---|
| Target Group Name | rancher-tcp-80 |
| Protocol | TCP |
| Port | 80 |
| Target type | instance |
| VPC | Choose your VPC |
| Protocol (Health Check) | HTTP |
| Path (Health Check) | /healthz |
| Port (Advanced health check) | traffic port |
| Healthy threshold (Advanced health) | 3 |
| Unhealthy threshold (Advanced) | 3 |
| Timeout (Advanced) | 6 seconds |
| Interval (Advanced) | 10 second |
| Success codes | 200-399 |
Screenshot Target group TCP port 80 settings
Screenshot Target group TCP port 80 Advanced settings
Register Targets
Next, add your Linux nodes to both target groups.
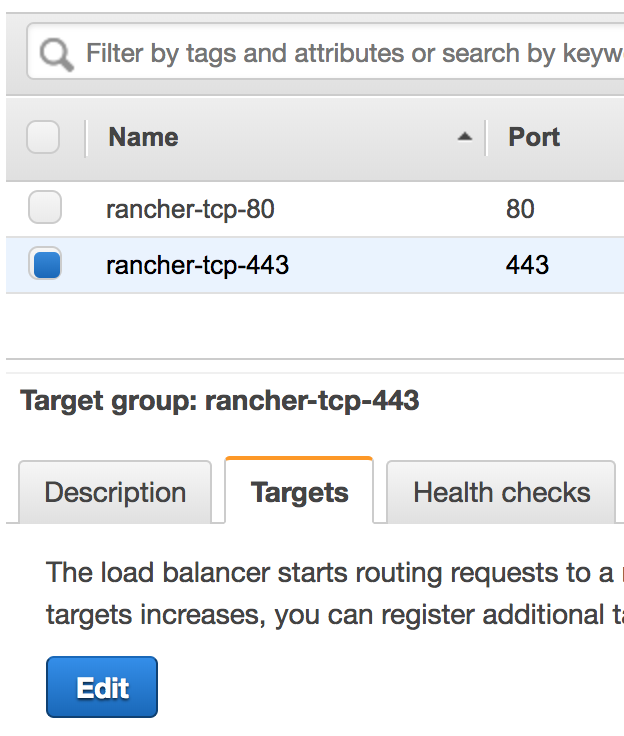
Select the target group named rancher-tcp-443, click the tab Targets and choose Edit.
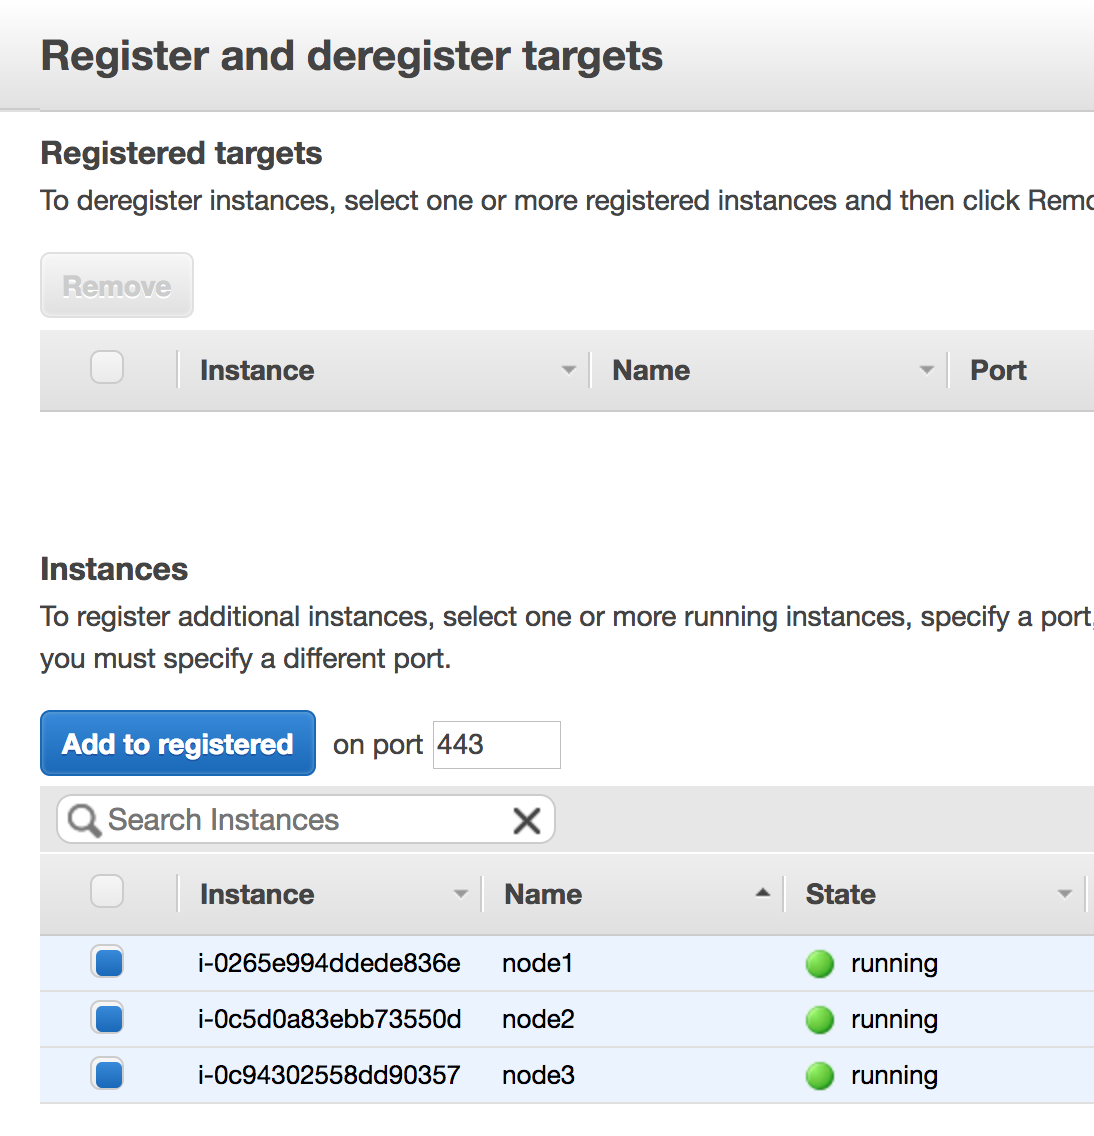
Select the instances (Linux nodes) you want to add, and click Add to registered.
Screenshot Add targets to target group TCP port 443
Screenshot Added targets to target group TCP port 443
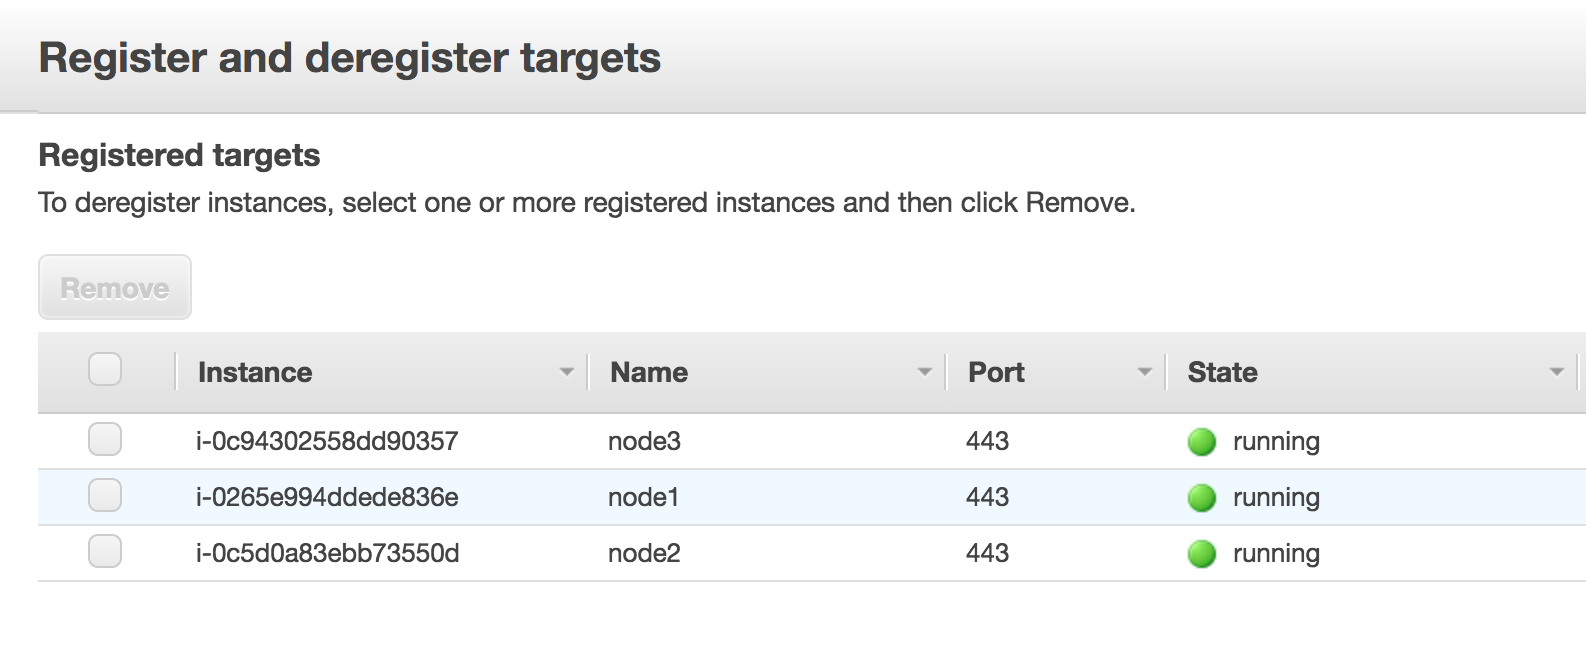
When the instances are added, click Save on the bottom right of the screen.
Repeat those steps, replacing rancher-tcp-443 with rancher-tcp-80. The same instances need to be added as targets to this target group.
Create Your NLB
Use Amazon's Wizard to create an Network Load Balancer. As part of this process, you'll add the target groups you created in Create Target Groups.
From your web browser, navigate to the Amazon EC2 Console.
From the navigation pane, choose LOAD BALANCING > Load Balancers.
Click Create Load Balancer.
Choose Network Load Balancer and click Create.
Complete the Step 1: Configure Load Balancer form.
Basic Configuration
Name:
rancherScheme:
internalorinternet-facingThe Scheme that you choose for your NLB is dependent on the configuration of your instances/VPC. If your instances do not have public IPs associated with them, or you will only be accessing Rancher internally, you should set your NLB Scheme to
internalrather thaninternet-facing.
Listeners
Add the Load Balancer Protocols and Load Balancer Ports below.
TCP:443
Availability Zones
- Select Your VPC and Availability Zones.
Complete the Step 2: Configure Routing form.
From the Target Group drop-down, choose Existing target group.
From the Name drop-down, choose
rancher-tcp-443.Open Advanced health check settings, and configure Interval to
10 seconds.
Complete Step 3: Register Targets. Since you registered your targets earlier, all you have to do is click Next: Review.
Complete Step 4: Review. Look over the load balancer details and click Create when you're satisfied.
After AWS creates the NLB, click Close.
Add listener to NLB for TCP port 80
Select your newly created NLB and select the Listeners tab.
Click Add listener.
Use
TCP:80as Protocol : PortClick Add action and choose Forward to...
From the Forward to drop-down, choose
rancher-tcp-80.Click Save in the top right of the screen.